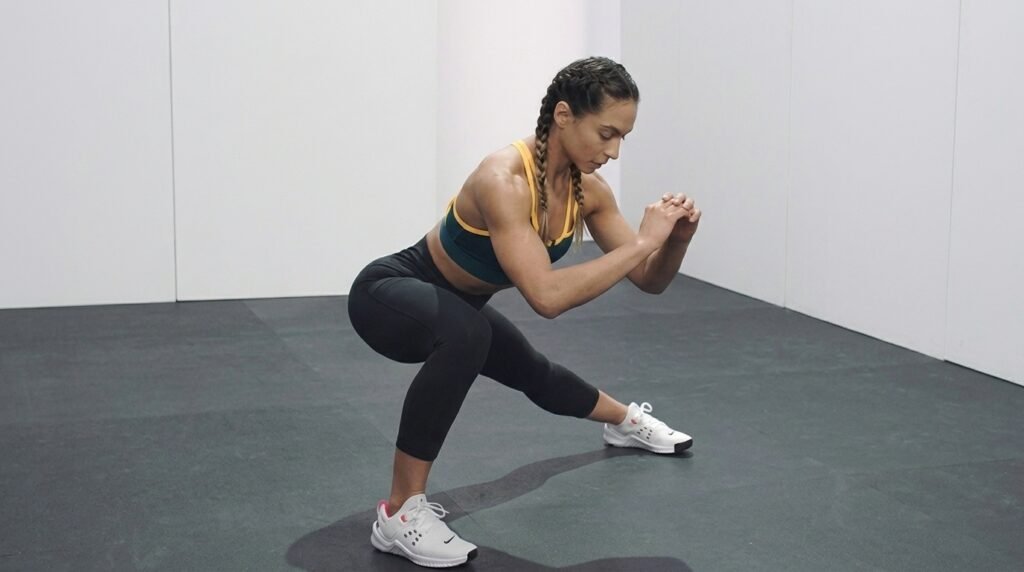
You have probably tried a lateral lunge and felt something was off. Maybe your foot rolled. Maybe your back rounded before you got low. Or maybe it just felt like a wide, wobbly squat.
You are not doing it wrong on purpose. This move has details that most gym advice skips right past.
That is what this guide fixes. You will learn exactly where to put your feet, how far to sit back, and how to spot the four mistakes that make your hips sore instead of strong.
You will also get real numbers. Sets, reps, starting loads, and a twelve week plan you can follow.
Beginner, coach, or athlete, the setup you need is here. Read on, and your next rep will feel completely different.
Why Is Side to Side Movement the Gap in Most Training Plans?
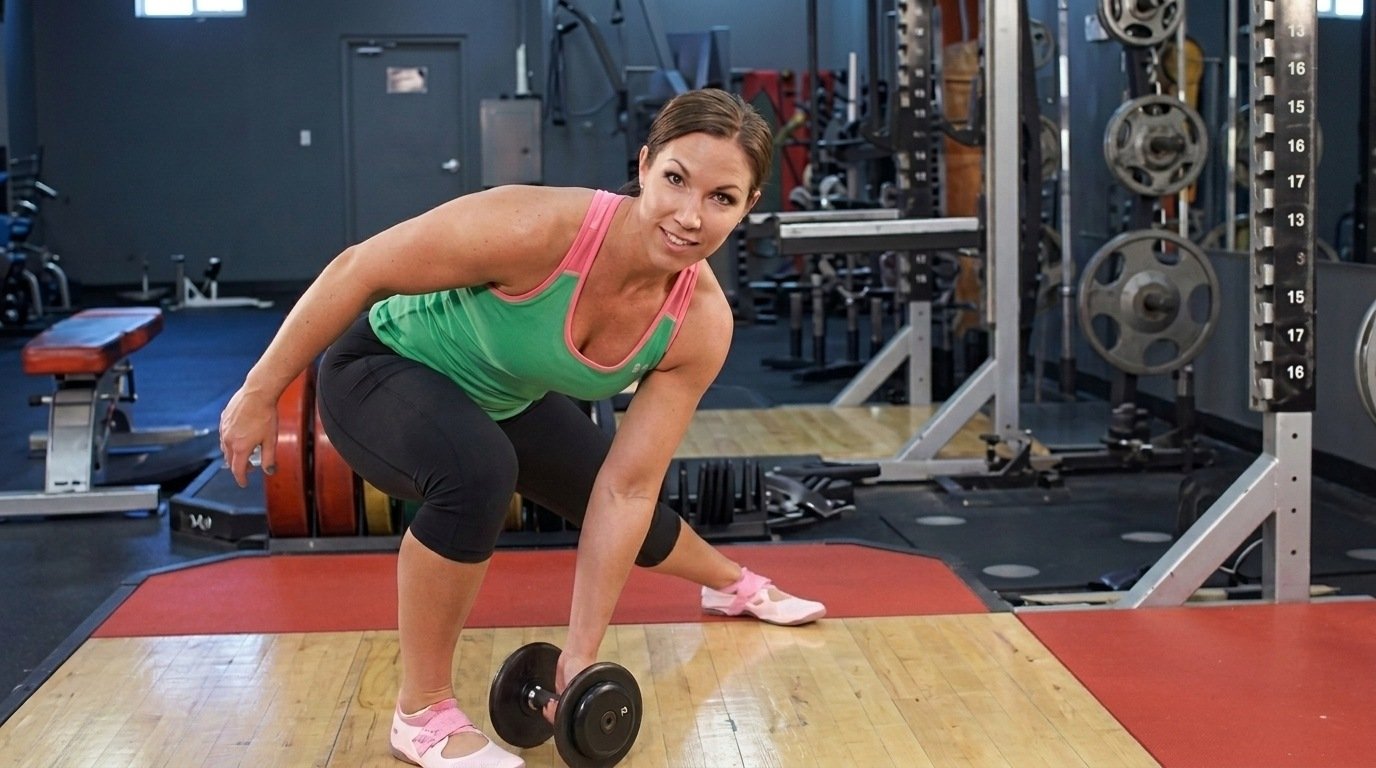
Squats, lunges, deadlifts, running. Almost all of it moves you forward and back. Trainers call that the sagittal plane.
That leaves your inner and outer hips undertrained. Sport does not work that way. Athletes cut, shuffle, and plant sideways.
So do you, every time you step out of a car or catch your balance on ice. Groin injuries are a known problem in sports built on cutting and sideways pushing, and hockey and soccer report some of the highest rates.
Weak or poorly conditioned adductors are one of the risk factors researchers point to.
The lateral lunge trains that missing direction, the frontal plane. It builds adductor strength and hip control where most plans leave a gap.
It also trains one leg at a time, which helps even out side to side imbalances.
What You Actually Get Out of This Exercise?
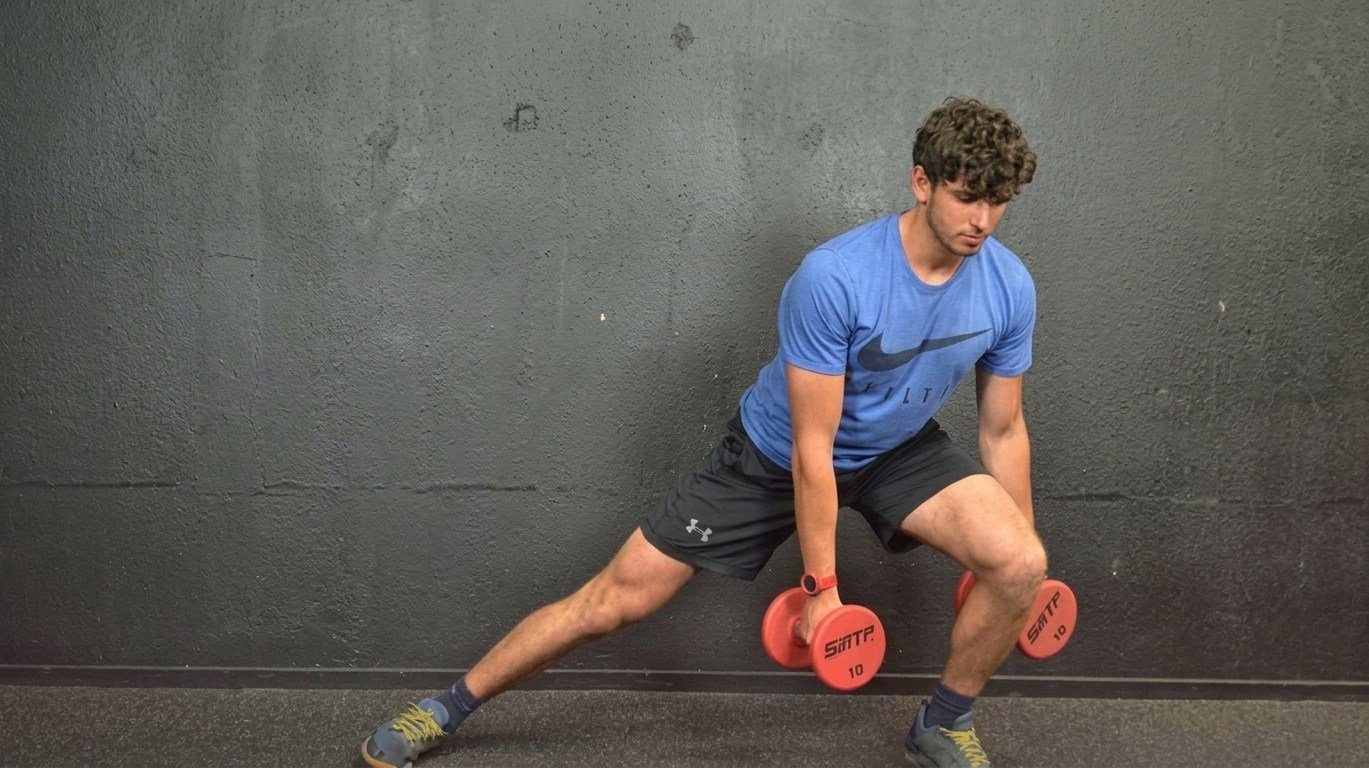
Five payoffs make this worth your time. None of them come from forward and back training alone.
- Stronger adductors through a full range: Your inner thighs load while lengthened, which is the position they get hurt in.
- Better hip stability: The stepping leg has to control a knee that wants to cave. That is direct glute medius work.
- Fewer side to side imbalances:One leg works at a time, so a weaker side cannot hide behind a stronger one.
- Better ankle and foot strength: Your foot absorbs and redirects force on every rep. That builds a steadier base.
- Carryover to real movement: Changing direction, catching your balance, stepping over something. All of it happens sideways.
The Muscles Doing the Real Work
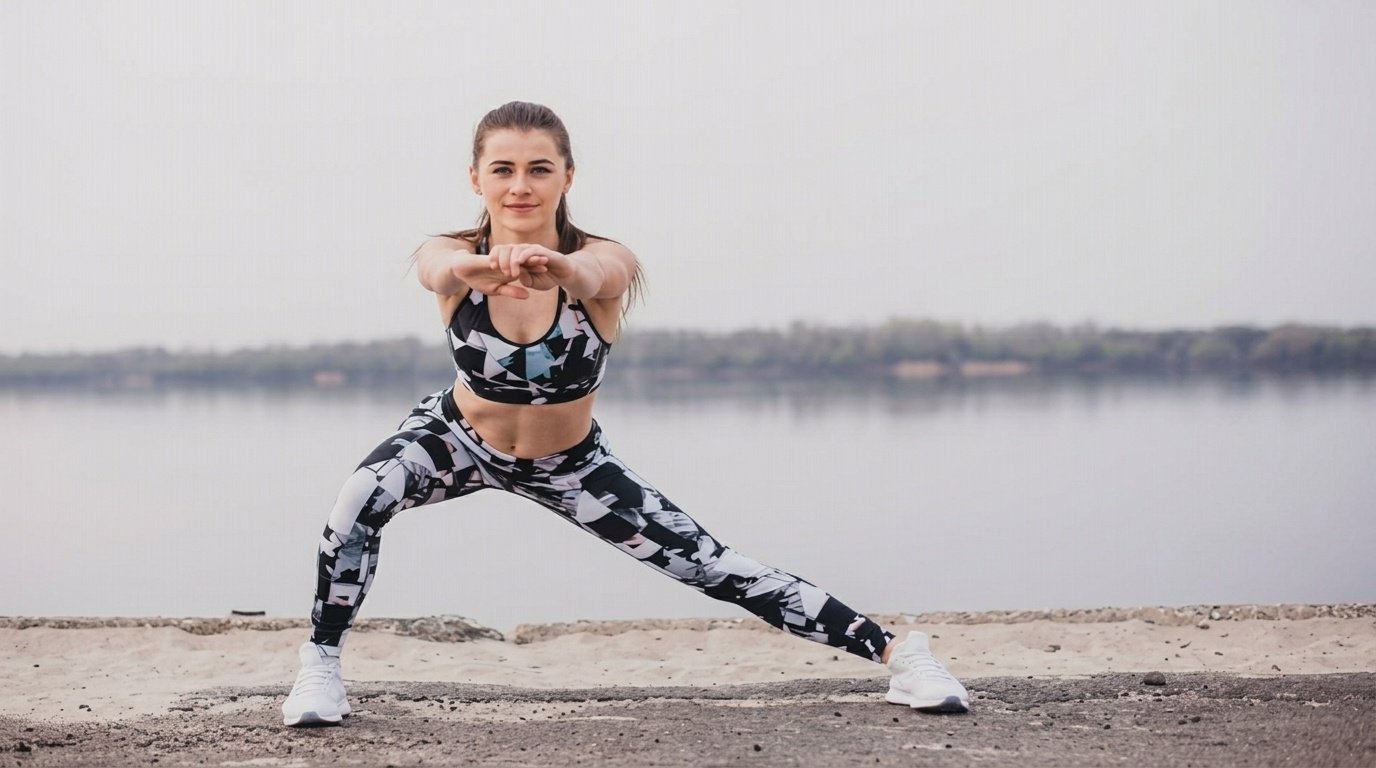
This looks like a leg exercise. It is really a hip exercise with a strong core demand attached. Here is what each part of your body handles during a single rep.
What Fires in the Stepping Leg?
Your quads take most of the load as the knee bends. Think of the bottom position as a single leg squat with a wide base.
The glute max drives you back up out of that hole. The glute medius, one of your hip abductors, works differently. It does not create the movement.
It stops your knee from caving in. That job runs the whole rep, not just part of it. Your hamstrings assist as the hips push back, and your calves, the soleus and gastrocnemius, hold the ankle steady while your foot stays flat.
What the Straight Leg Is Quietly Doing?
Your trailing leg is not resting. The adductors along the inner thigh stretch under load, then help pull you back to center.
That group includes the adductor magnus, longus, and brevis. That loaded stretch is the whole point.
Adductor strain is common in soccer, hockey, and basketball. Training a muscle in a lengthened position is one of the better ways to build tolerance there.
The Core and Hip Job No One Talks About
Your torso wants to tip sideways. Stopping that is called anti lateral flexion, and it is what your obliques and deep core handle here.
Same job as a suitcase carry, just standing still. Meanwhile the hip on your stepping side has to fold deeply while your foot stays flat.
That takes real ankle and hip mobility. Want a quick test? Try one rep and pause at the bottom for three seconds. If your ribs flare or your side aches before your legs do, your core is the weak link.
Warm Up Before You Load This
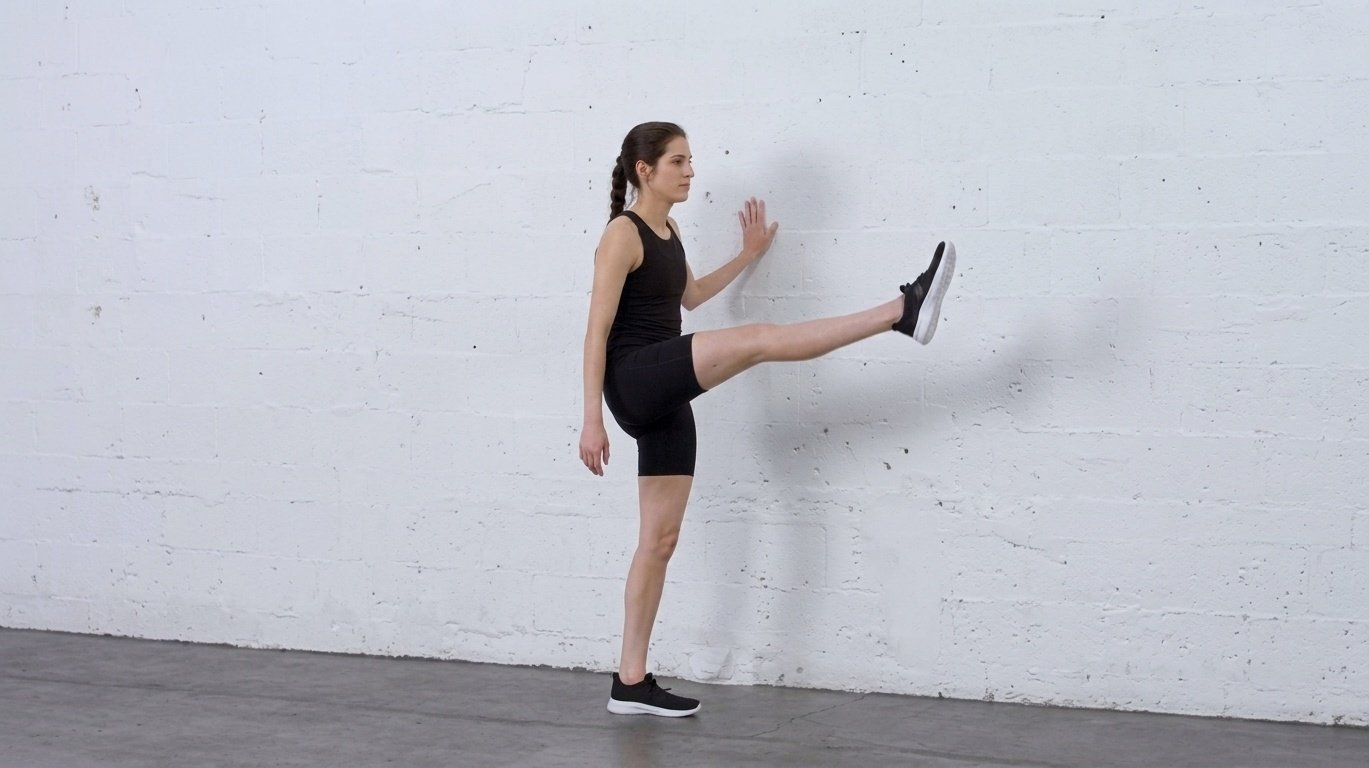
Cold hips make this move ugly. Five minutes of prep fixes most of it.
Do ten leg swings side to side per leg. Then ten bodyweight lateral shifts with no depth.
Add ten ankle rocks per side against a wall. Finish with five slow half range lateral lunges. Now your first working rep will not be your worst one.
How to Do a Lateral Lunge, Step by Step
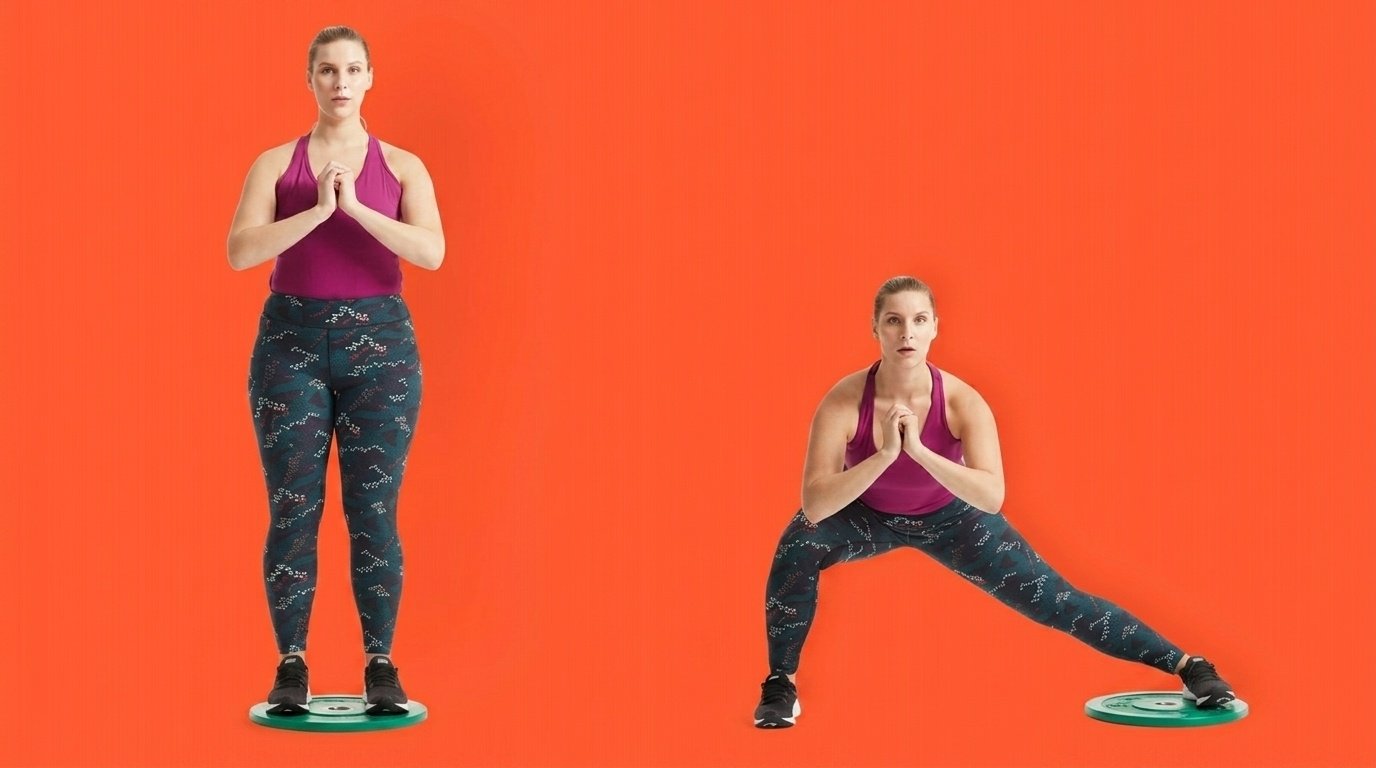
Three steps make the movement. A fourth section covers breathing and pace, which matter just as much once you add weight.
1. Setting Your Stance and Foot Position
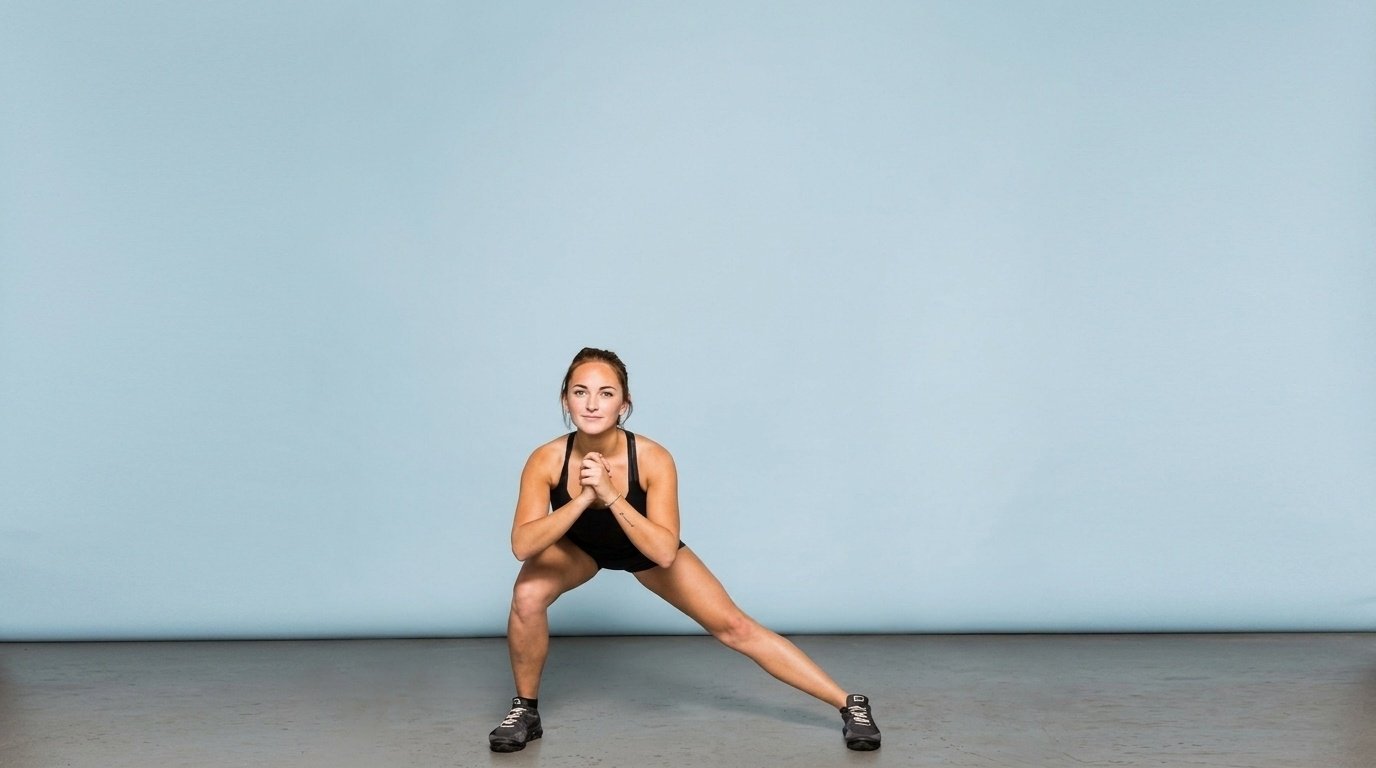
Stand tall with feet hip width apart. Point both feet straight ahead, not turned out.
Step wide to one side, roughly two to three feet depending on your height. A good check is about double your normal squat stance. Land with your whole foot flat.
Keep your chest up and your arms free to counterbalance in front of you. Brace your midsection before you move.
2. The Descent: How Far Down Is Far Enough
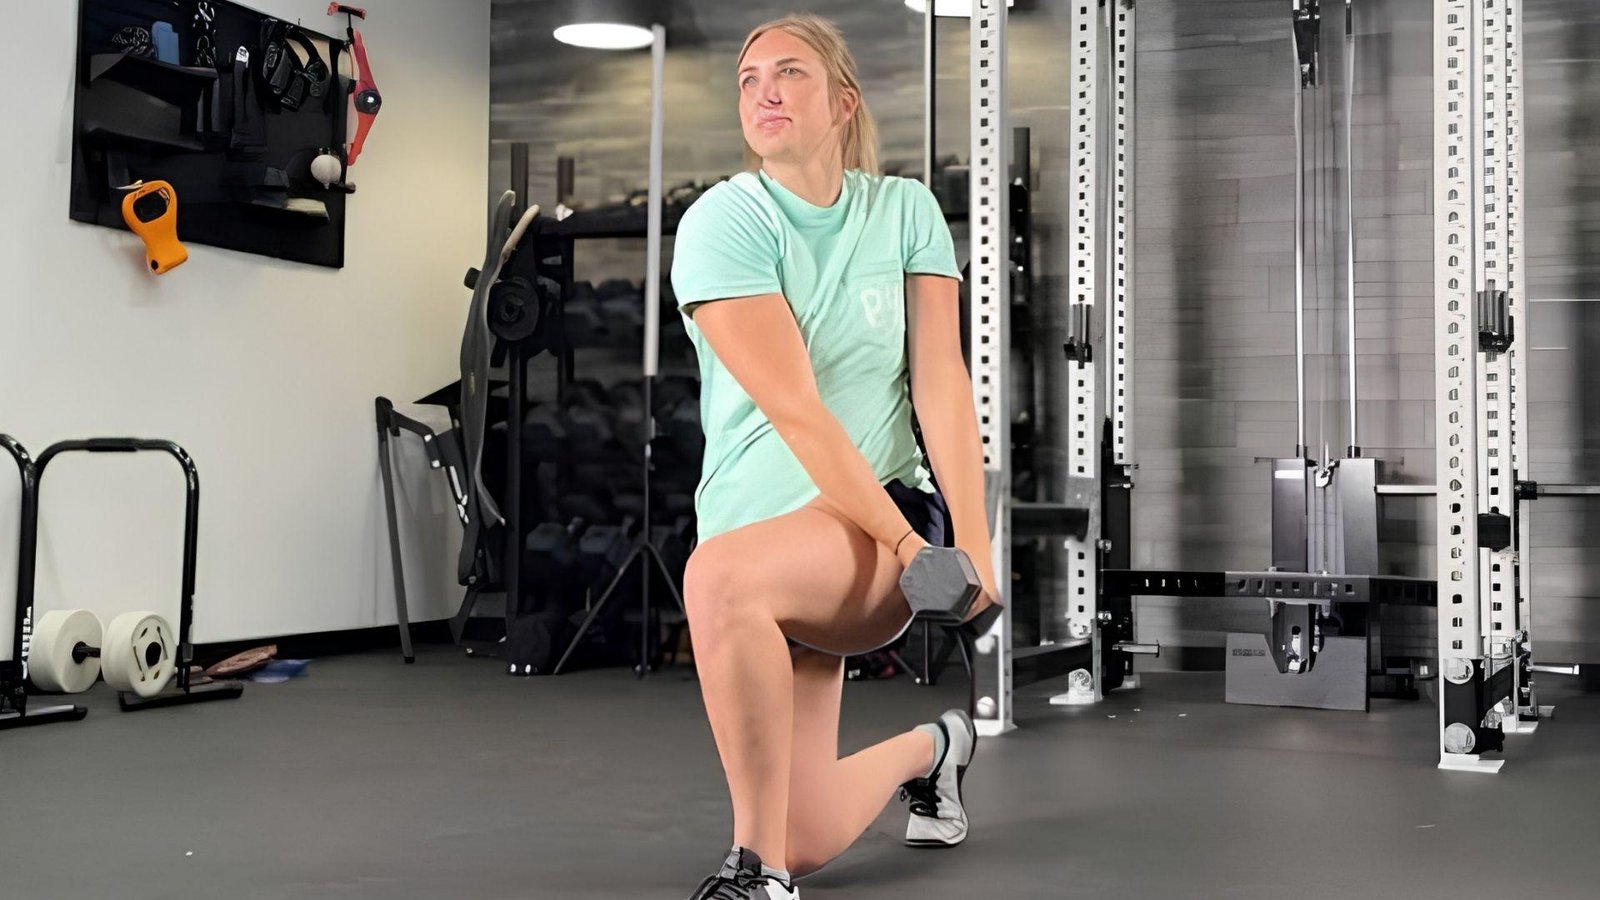
Push your hips back and bend the stepping knee. This is a hip hinge, not a squat. Think of sitting back into that hip, not dropping straight down.
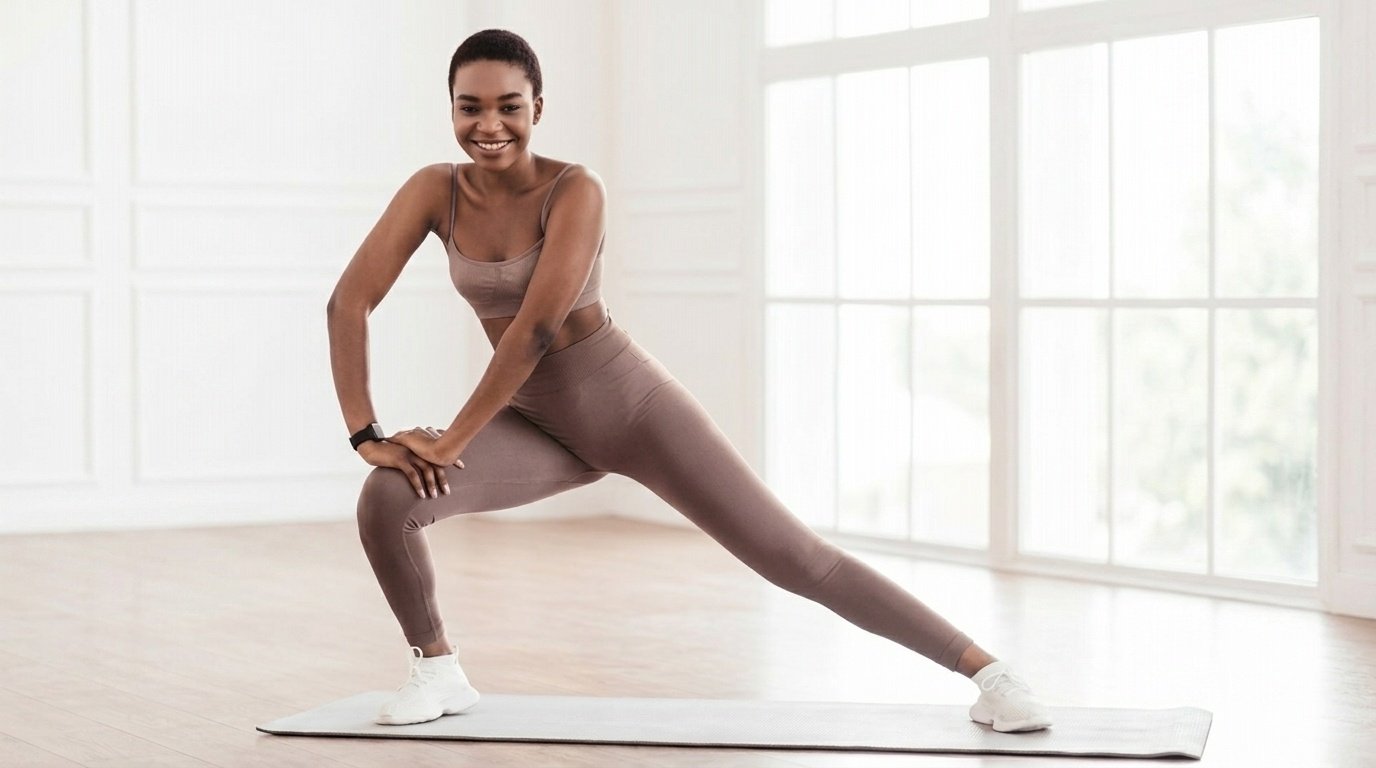
Keep the other leg straight with the foot flat. Go until your stepping thigh is near parallel to the floor, or until your inner thigh feels a firm stretch.
Stop before your heel lifts or your back rounds. Those two signals mean you have gone past what your hips can hold.
3. Pushing Back to the Start Without Losing Balance
Drive through the heel and midfoot of your bent leg. Push the floor away and let your hips lead you back to standing.
Do not pull yourself up with the straight leg. Bring the foot back under your hip in a controlled step.
Finish standing tall before you start the next rep. Rushing the reset is where balance falls apart.
4. Breathing and Tempo That Keep You Steady
Breathe in as you step and lower. Breathe out as you push back to standing.
Take two to three seconds going down. That slower descent gives your hips time to react and keeps you from bouncing out of the bottom.
Speed up only once the pattern feels automatic under load. Even then, keep the descent controlled.
Form Cues That Fix Your Rep in One Try
- Sit back, do not sink down: Sinking bends both knees and turns this into a wide squat. Sitting back keeps the load on your hips and inner thigh.
- Both feet flat, all ten toes down: A rolling foot means your step is wider than your mobility allows.
- Chest tall, eyes forward: Your spine follows your head. Look down and your back rounds.
- Knee tracks over your second and third toe: A knee that drifts inward puts a shear load on the joint.
- Push through the heel, not the ball of your foot: Heel drive keeps your hips involved. Toe drive shifts the work to your quads and pulls you forward.
- Keep the straight leg straight: If you cannot, shorten your step. A bent trailing leg lets the adductors off the hook completely.
Lateral Lunge vs Forward Lunge vs Lateral Squat
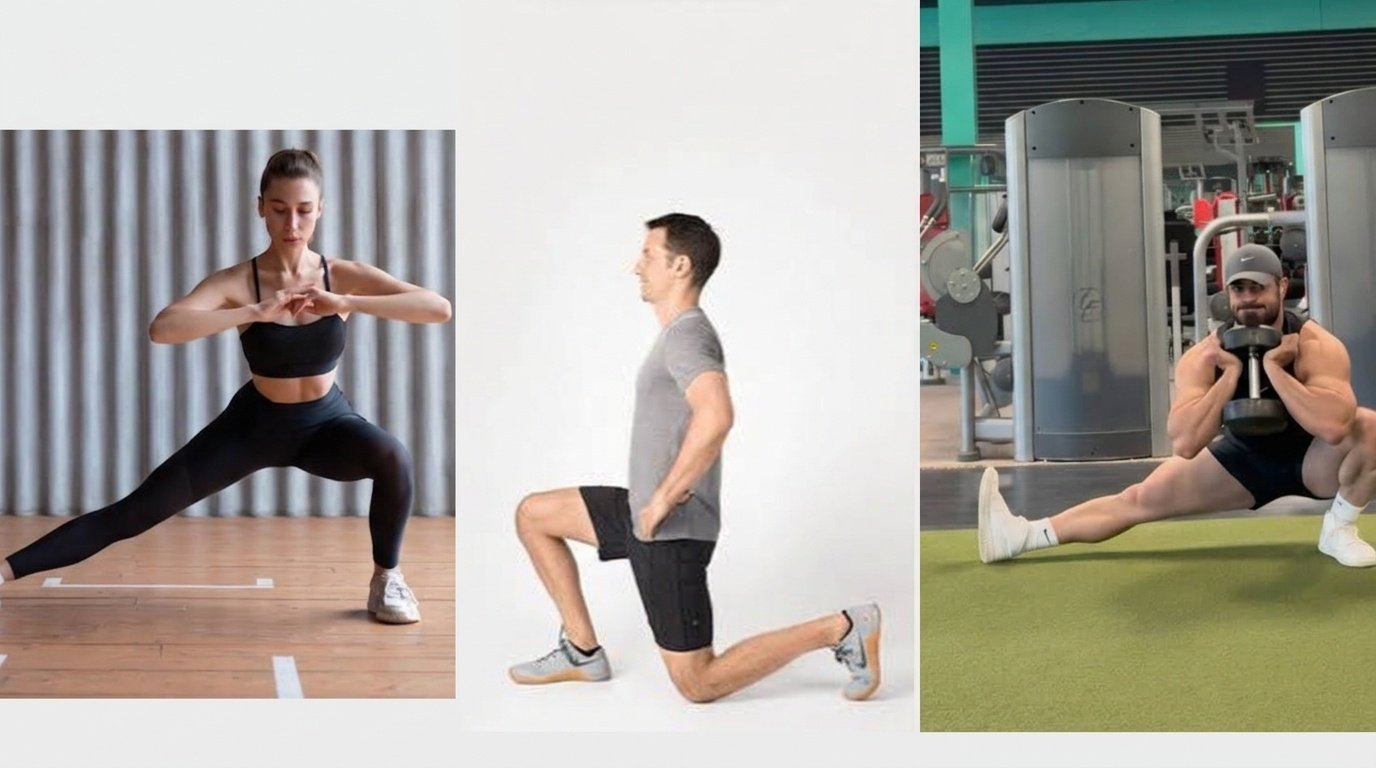
Three moves, often confused. Here is what separates them.
| Movement | Direction | Step involved? | Main demand |
| Forward or reverse lunge | Forward and back (sagittal) | Yes | Quads and glutes |
| Lateral lunge | Side to side (frontal) | Yes | Adductors, hip stability, balance |
| Lateral squat | Side to side (frontal) | No, feet stay planted | Adductors, allows heavier load |
The forward lunge trains the direction you already train. The lateral lunge adds the sideways direction plus a balance challenge, because your foot leaves the floor.
The lateral squat drops the step. Your feet stay planted the whole time, so you can hold more weight. Less balance work, more load. Use it when strength is the goal or when stepping still feels shaky.
Mistakes That Turn a Good Rep Into a Sore Hip
Four common errors turn the lateral lunge from a hip-opening move into a source of soreness:
- Bending both knees: This turns the movement into a wide squat, hips drop straight down, and the inner thigh never loads. Keep one leg locked straight and push your hips back behind you.
- Rounding the back to reach depth: When hips are tight, people bend at the spine and drop the chest toward the knee, shifting load onto the lower back. Hinge from the hips, keep a flat back, and cut your depth instead.
- Letting the straight-leg foot roll or lift: A trailing foot that rolls onto its outer edge or lifts at the heel means the step was too wide, and it kills the adductor stretch. Shorten the step until that foot stays flat.
- Stepping too wide too soon: Wide steps force depth your hips cannot control yet, which is where groin strains happen. Add width over weeks so your range grows from stronger hips, not from forcing it.
Easier Versions If Your Hips Are Not There Yet
Tight hips are common, especially if you sit most of the day. These options build the pattern safely, in order from easiest to hardest.
Lateral Squat With No Step at All
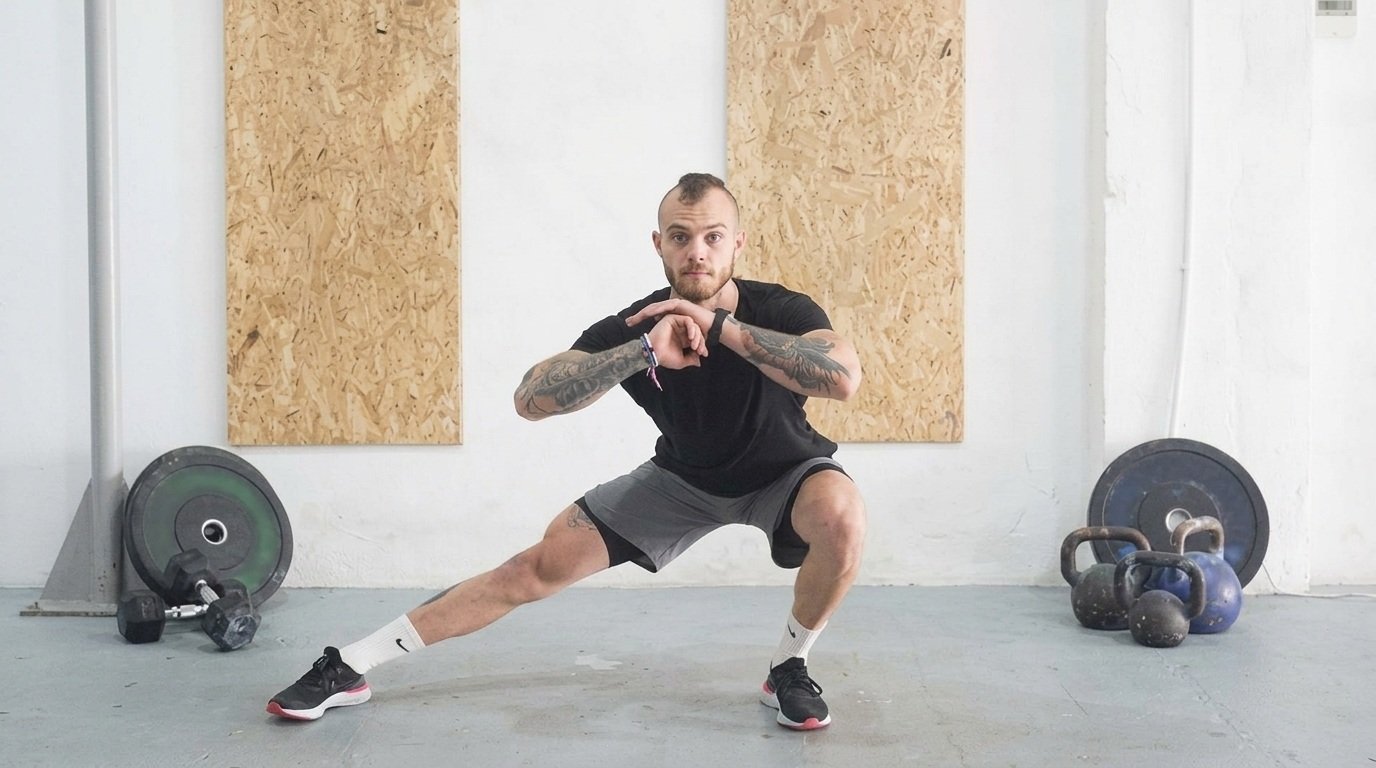
The lateral squat looks the same but has no step. You set your wide stance first, then shift side to side with both feet planted.
Taking the step out removes the balance demand. That makes it the best entry point for most beginners.
Do two to three sets of eight per side. Add the step back once the shift feels solid.
Supported Lateral Lunge Using a Rack or Wall
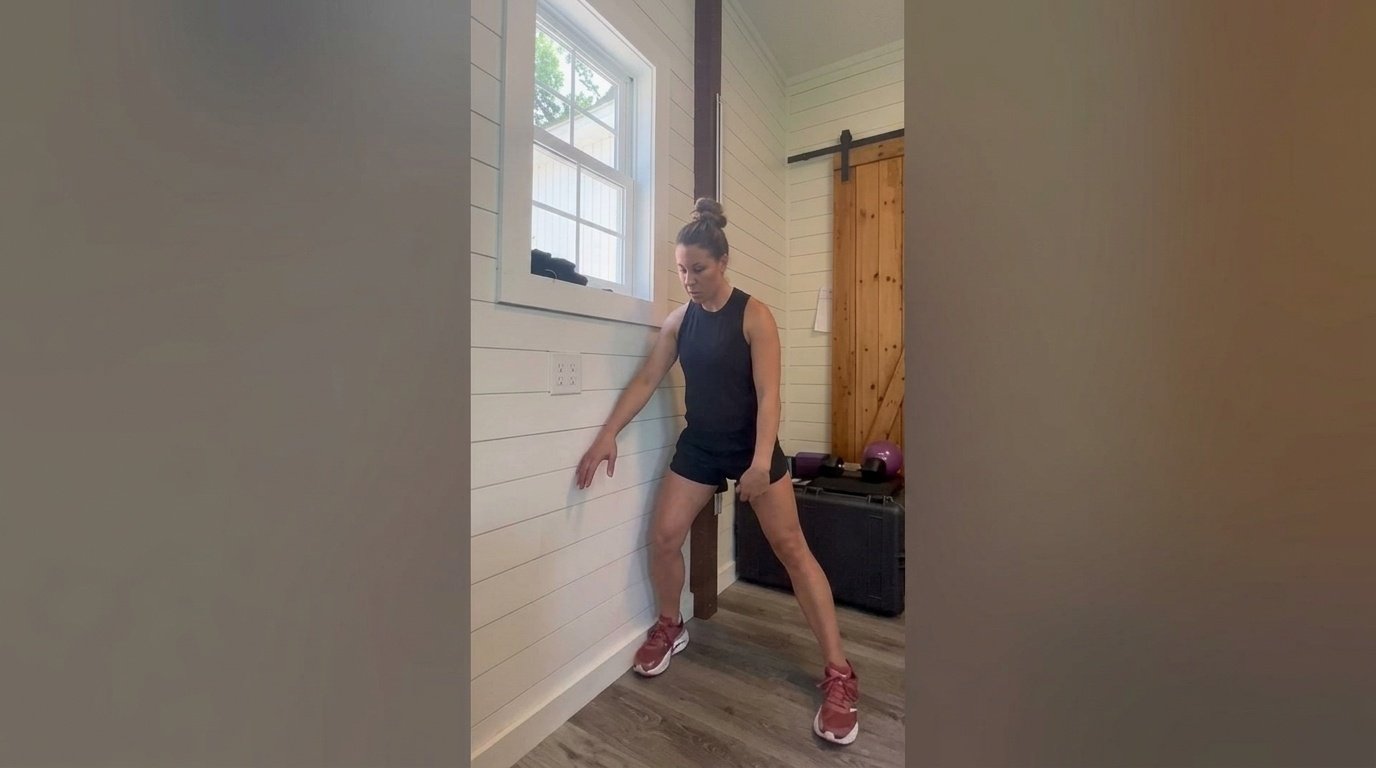
Hold a squat rack upright, TRX strap, doorframe, or the back of a sturdy chair. Use your hands for light balance only.
This lets you focus on hip position instead of fighting to stay upright. Most people reach better depth right away.
Do two to three sets of eight per side. Reduce your grip pressure each session until you no longer need it.
Half Range Lateral Lunge
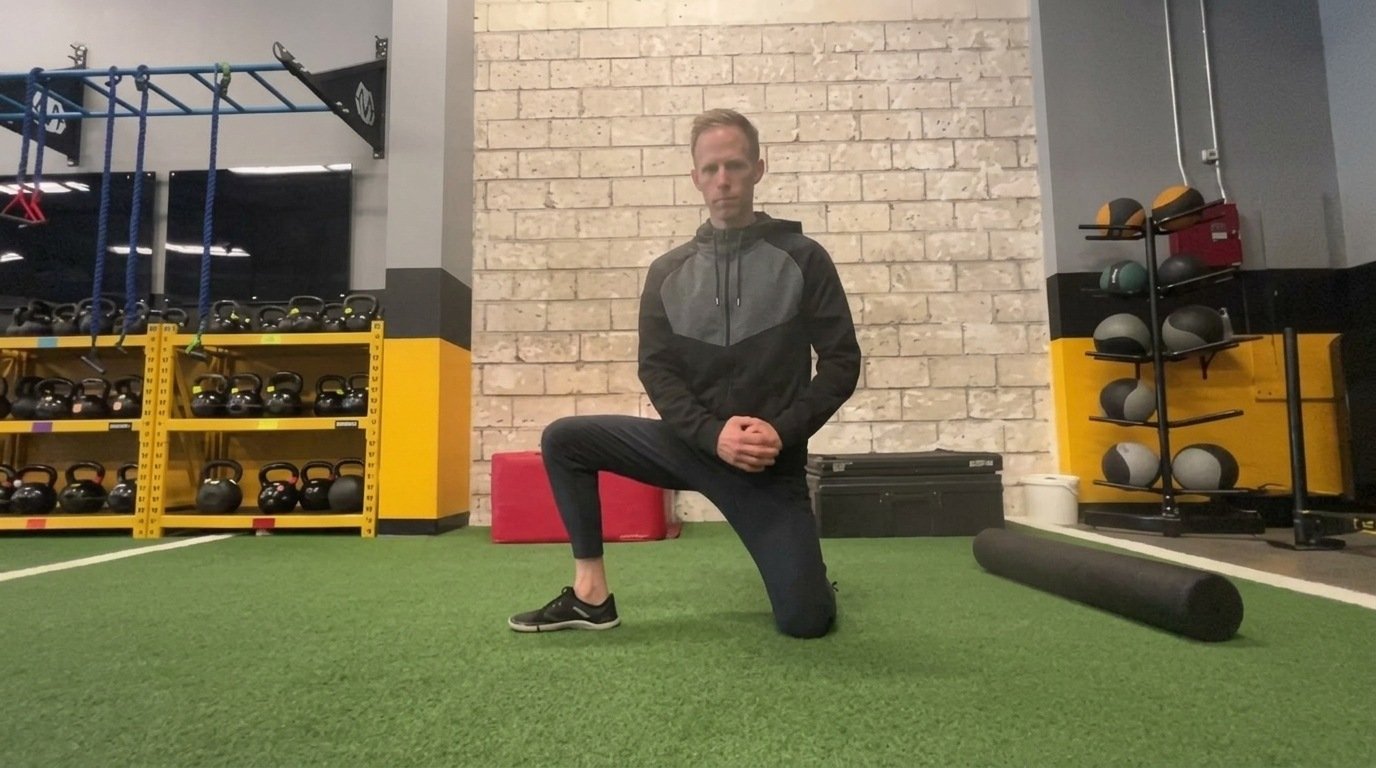
Go down only as far as you can with a flat back and both feet planted. That might be a quarter of the way at first.
Own that range for two or three weeks. Add an inch of depth when it feels easy.
If your heel keeps lifting, poor ankle mobility is the limit. Add wall ankle rocks and calf stretching on the side.
Cossack Squat as the Next Step Up
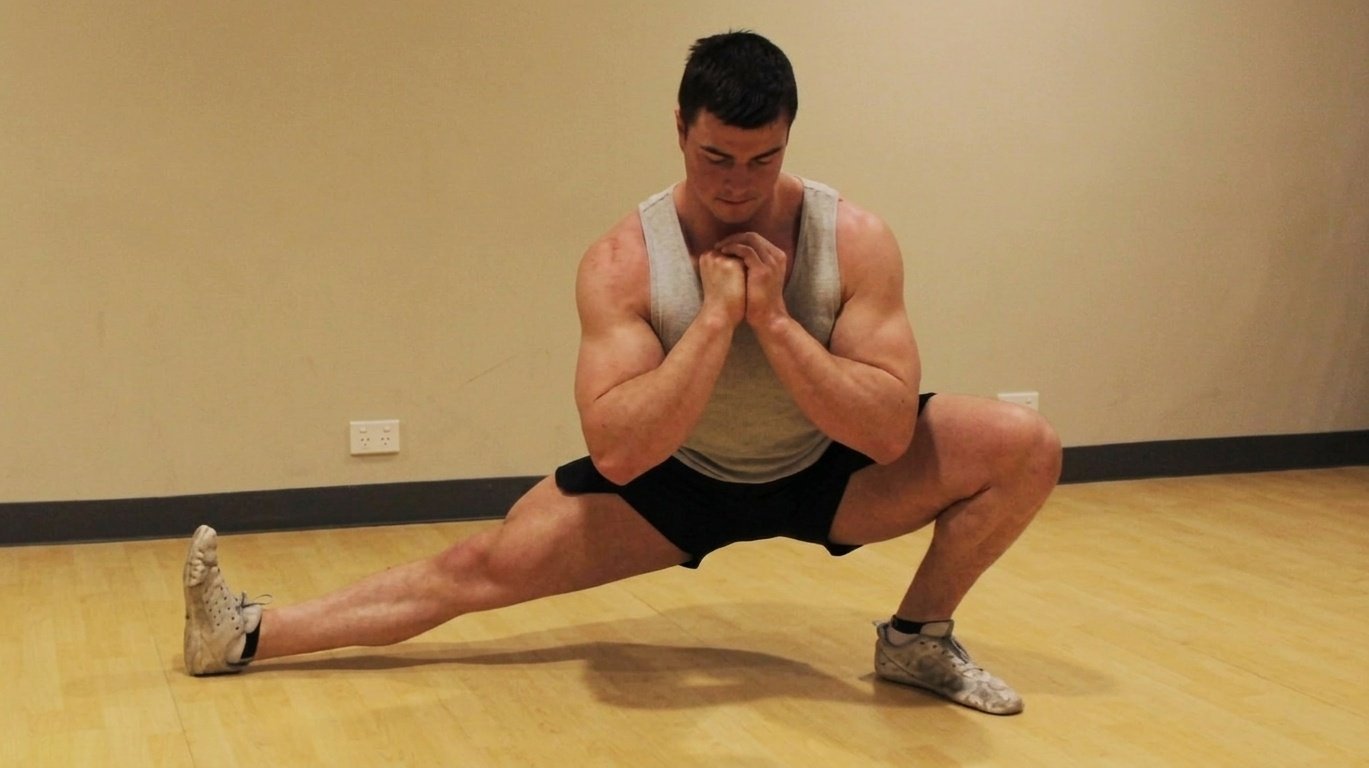
The Cossack squat is deeper than a lateral lunge, not easier. Your trailing toes lift and point up while you sink low.
Treat it as a progression once full range lateral lunges feel comfortable. Start by holding a counterweight plate at chest height, around 5 to 10 pounds.
That helps you stay upright and reach depth. Use it as a mobility drill on warm up days, not a heavy strength lift.
Loaded Variations Once Your Form Holds Up
Add weight only after your bodyweight reps look clean. Each option below changes the demand slightly.
| Variation | Equipment | Difficulty | Best for |
| Dumbbell or kettlebell goblet | One dumbbell or kettlebell | Beginner to intermediate | Simple load, easier to stay tall |
| Landmine | Barbell plus landmine sleeve or a corner | Intermediate | Lifters whose chest drops forward |
| Slider | Slider, towel, or paper plate | Intermediate | Adductor control, home training |
| Lunge to balance | None or light | Advanced | Athletes training change of direction |
Dumbbell Lateral Lunge for Simple Added Load
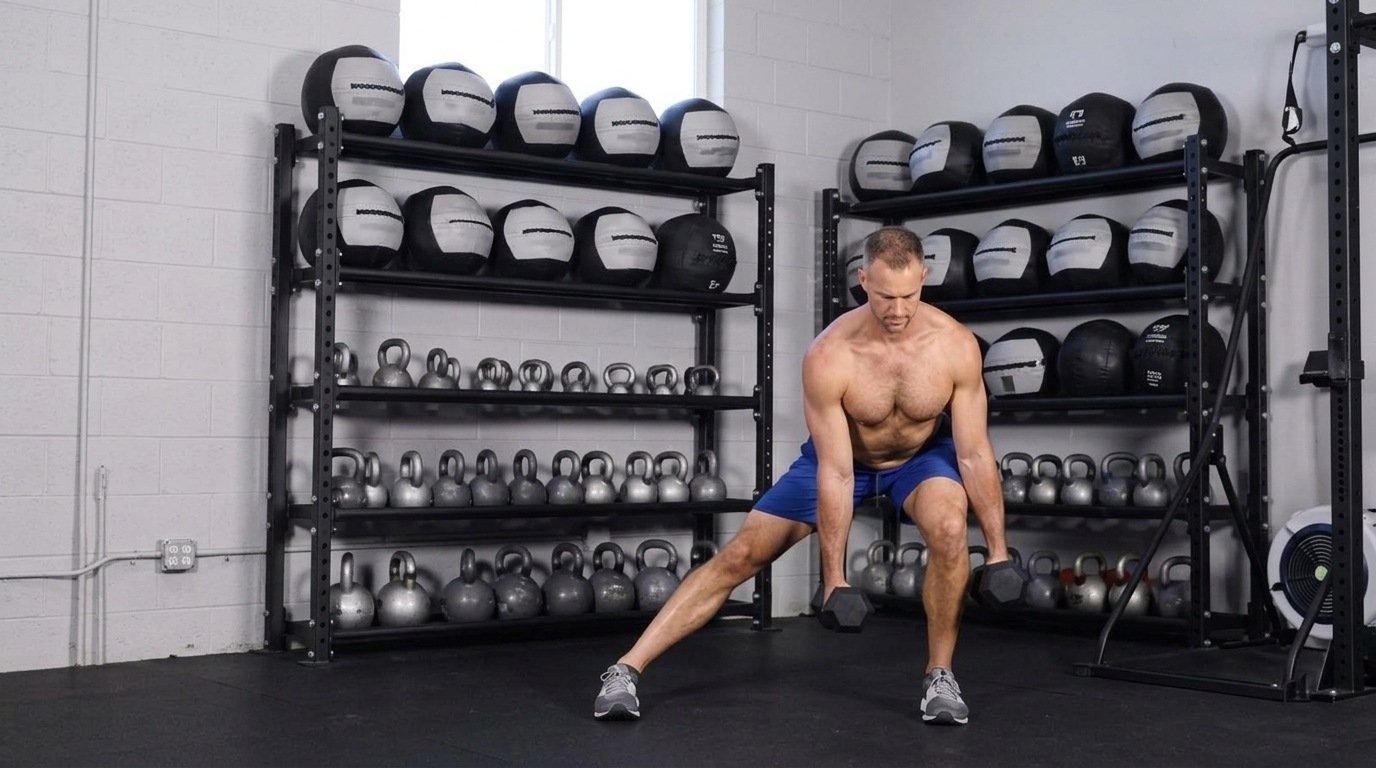
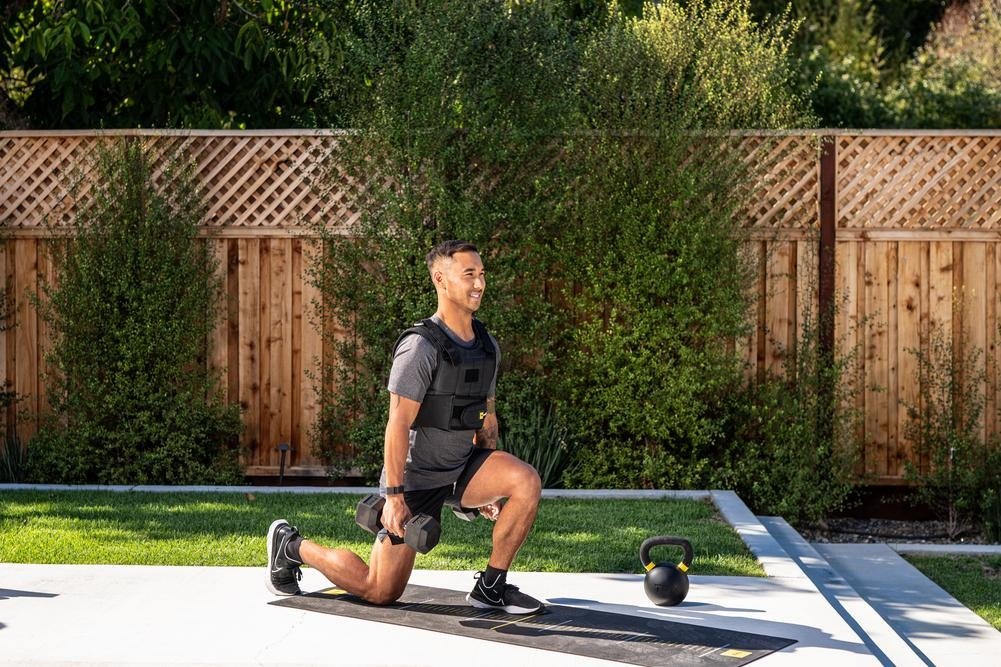
Hold one dumbbell or kettlebell at chest height in a goblet position. That counterweight helps you stay upright and sit back further.
Two dumbbells at your sides work too, but they make balance harder. Start light, around 15 to 25 pounds goblet style.
Do three sets of eight to ten per side. Add weight only when your knee stays stable through every rep.
Landmine Lateral Lunge for Better Torso Control
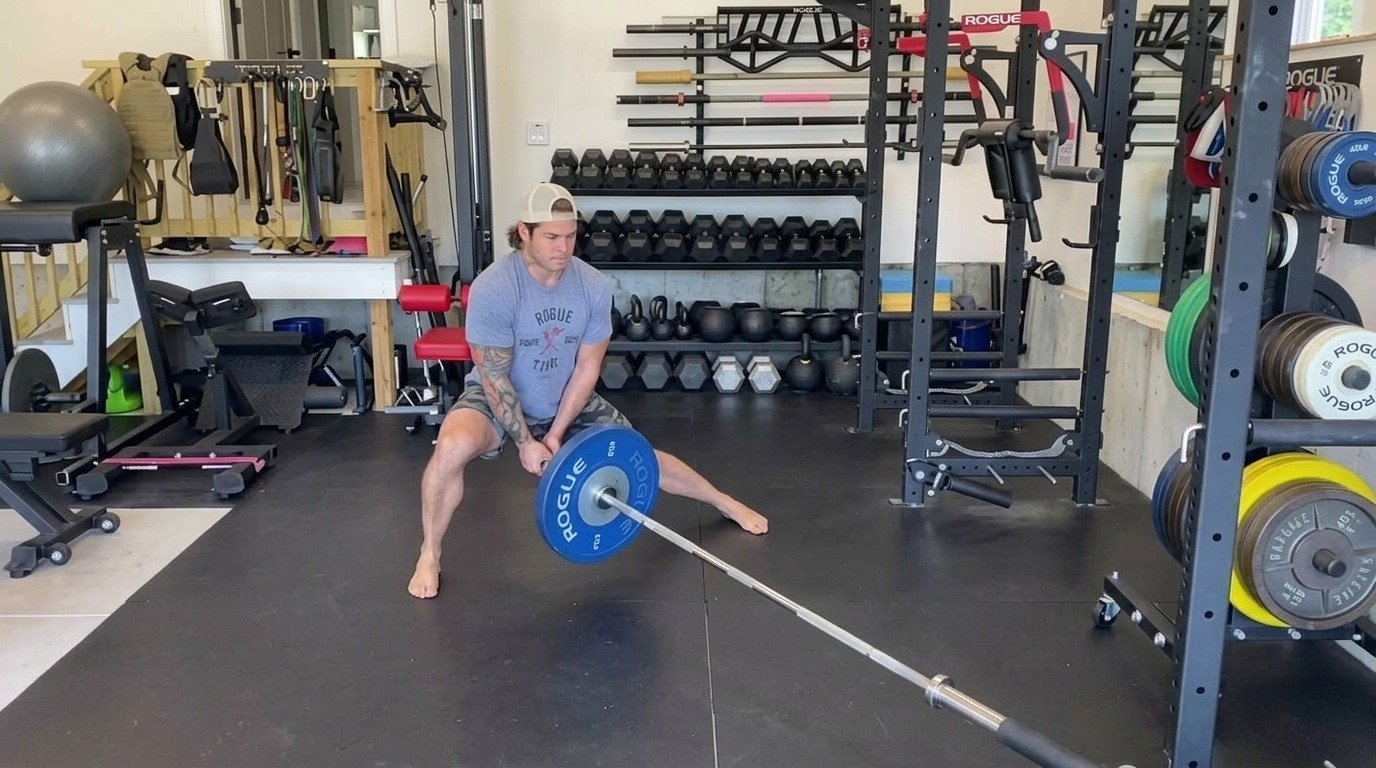
Load one end of a barbell in a landmine sleeve. No sleeves? Wedge the bar into a corner with a folded towel to protect the wall.
Hold the free end at chest height with both hands. The arc of the bar pulls you slightly forward, which forces your core and upper back to work harder.
Start with the empty bar, around 45 pounds at the sleeve end but far lighter in your hands. Do three sets of eight per side.
Slider Lateral Lunge for Constant Tension
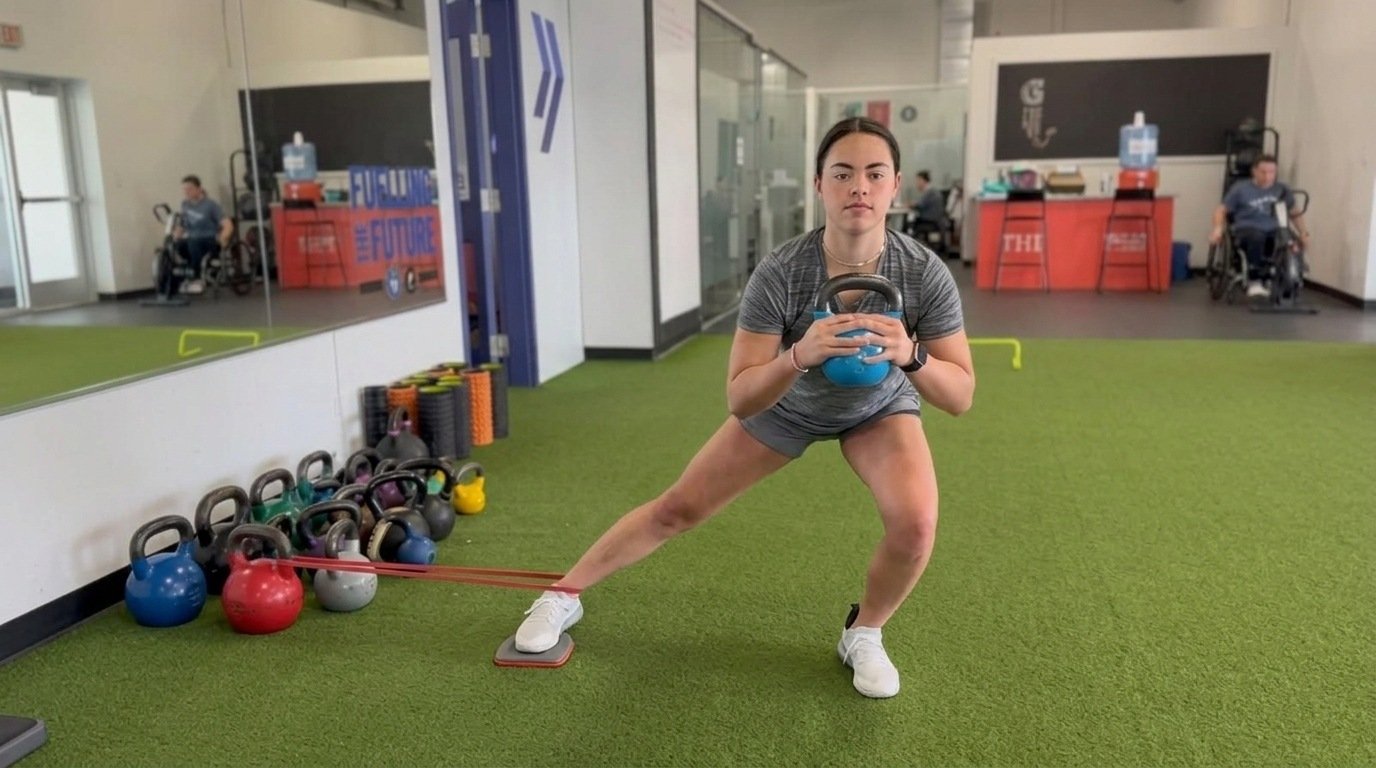
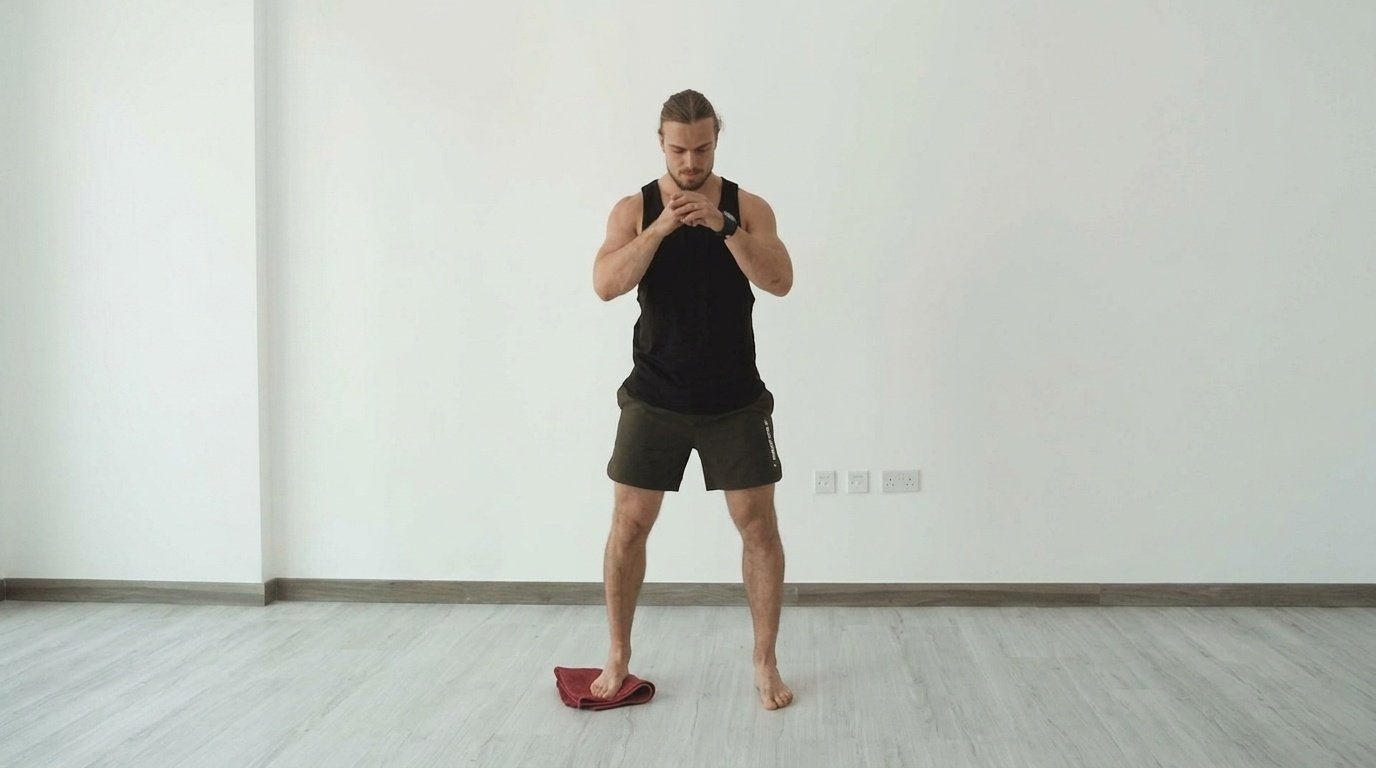
Place a slider, towel, or paper plate under one foot. Carpets need a plastic slider, hard floors need a towel.
Slide that foot out to the side while you sit into the other hip. Your working leg never gets a break.
It controls the slide out and pulls the foot back in. Do two to three sets of six to eight per side. Body weight is plenty here.
Lateral Lunge to Balance for Athletes
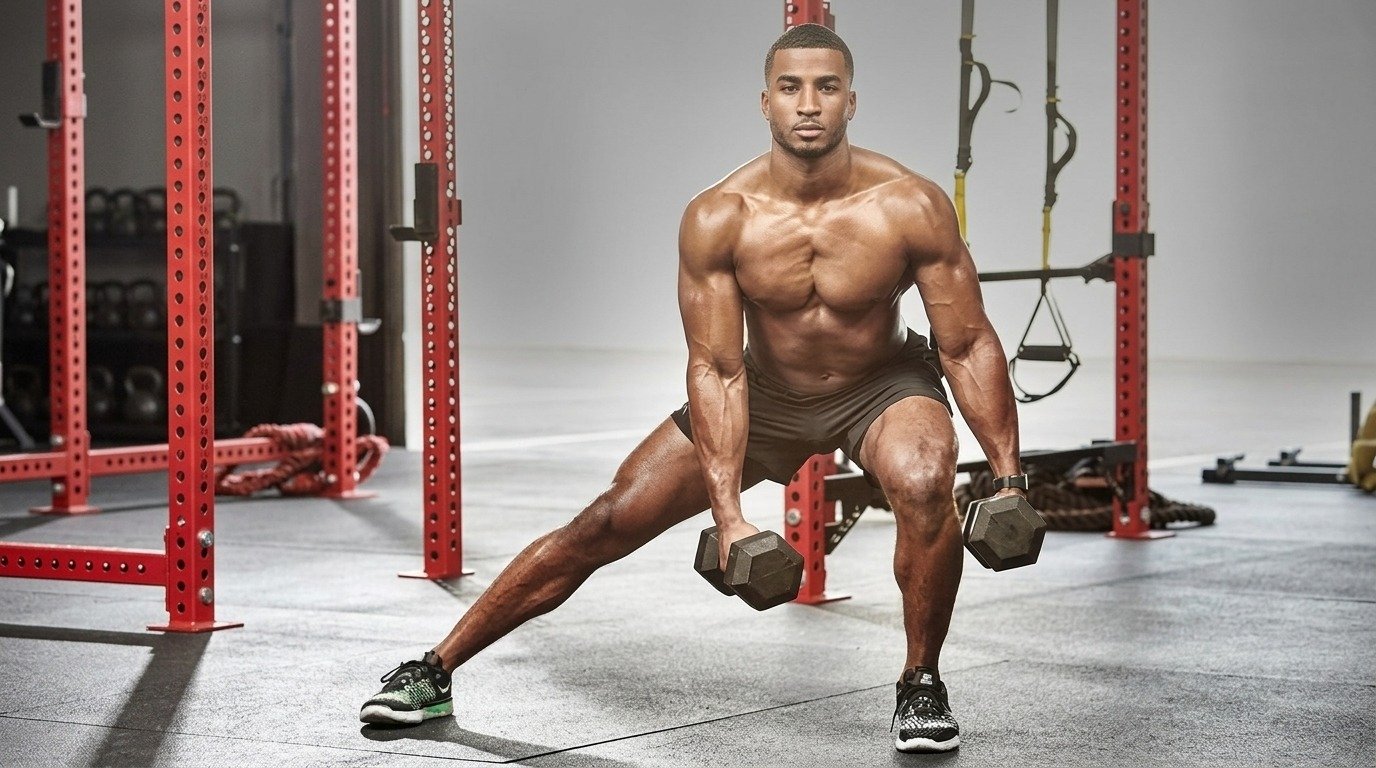
Push out of the lunge hard and drive the free knee up into a single leg stand. Hold for one second.
This trains the plant and pushes off that change of direction demands. Keep it bodyweight or light.
Do three to four sets of three to five reps per side. Rest 60 to 90 seconds. Place it early in a session, right after your warm up, while you are fresh.
How to Program It for Your Goal?
Where this sits in your week depends on what you want from it. Use one of these setups.
Beginners Building Hip Control
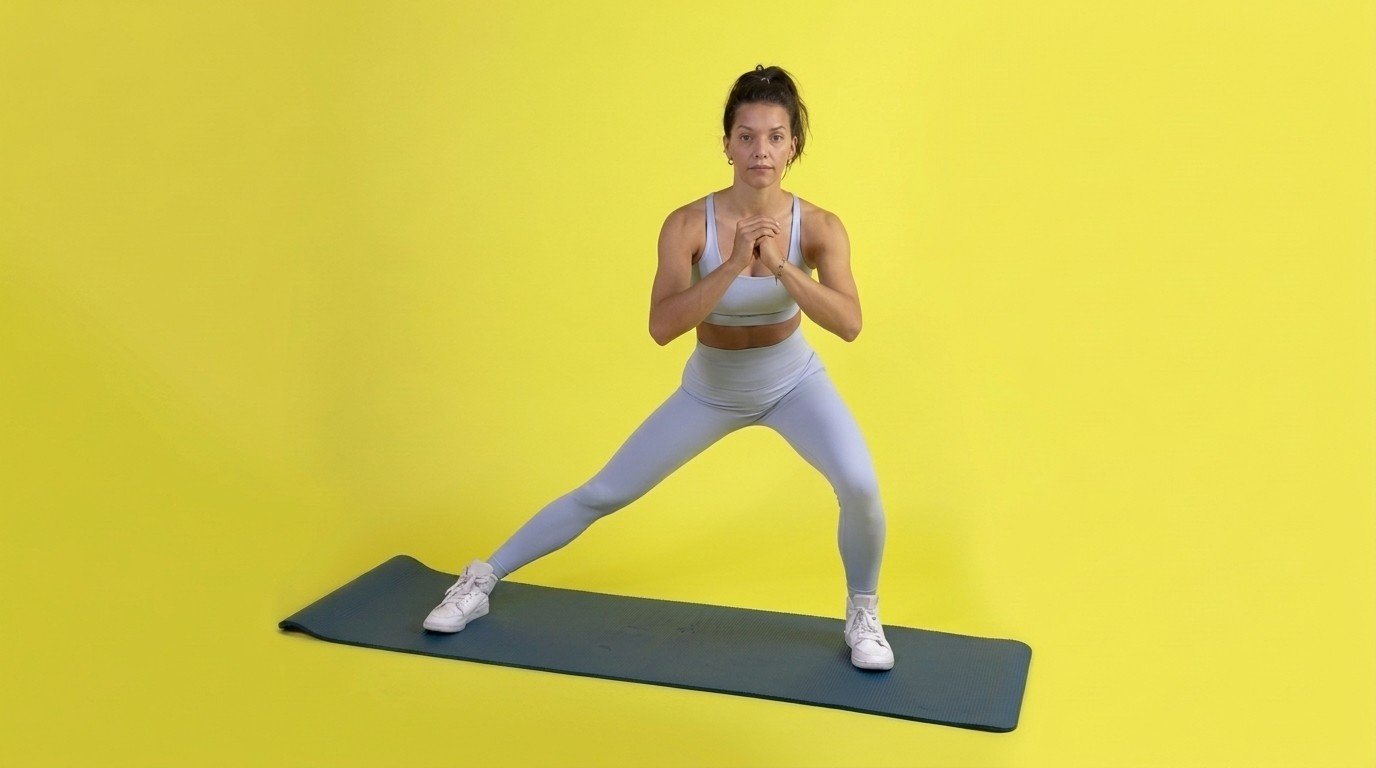
Start with bodyweight only. Two sets of eight reps per side, two days a week.
Do it after your warm up, before heavy squats or deadlifts. Your hips will be fresh and your form will hold.
Once eight reps feel smooth for three straight sessions, add a light goblet dumbbell.
Athletes Training Change of Direction
Train it in the off season and in season both. Use three to four sets of six to eight reps per side with moderate load.
Place it after your main lift on lower body days. The goal is deceleration control for cutting, not a personal record.
Add weight only when all reps stay clean at the current load for two straight sessions. In season, drop the load and keep the reps.
Sets, Reps and Where It Fits in a Session?
For general strength, three sets of eight to twelve per side works well. Rest 60 to 90 seconds between sets.
Treat it as an accessory lift, not your main one. Two sessions a week is plenty.
Always finish your reps on your weaker side first so both sides get equal quality work.
A Sample Lower Body Day
Here is what it looks like in a real session.
- Warm up, five minutes as above
- Back squat, four sets of five
- Romanian deadlift, three sets of eight
- Lateral lunge, three sets of ten per side
- Calf raise, three sets of twelve
A Twelve Week Progression

Weeks 1 to 3: Lateral squat or half range, bodyweight, two sets of eight.Weeks 4 to 6: Full range bodyweight, three sets of ten. Balance and hip control usually feel different by now.Weeks 7 to 9: Goblet load, 15 to 25 pounds, three sets of eight.Weeks 10 to 12: Add load or switch to landmine or lunge to balance. Strength and shape changes generally show around this point.
When to Skip It or Ask a Professional First?
Sharp knee pain during the descent is a stop signal. So is any pinch at the front of your hip.
That pinch can point to femoroacetabular impingement, or FAI, where the ball and socket of the hip do not clear each other properly at deep angles. It often shows up as a groin pinch when the hip bends and turns inward. It needs a proper assessment, not a form tweak.
If you have had a groin or adductor strain, get cleared before loading this. Recent knee or hip surgery means the same.
Three Swaps That Train the Same Direction
- Lateral band walks: Loop a band above your knees. Take small side steps with a soft knee bend, staying low the whole time. Two sets of ten steps each way.
- Copenhagen side plank: Lie on your side with your top leg resting on a bench. Lift your hips and hold. Start with the knee on the bench instead of the ankle. Three holds of ten to fifteen seconds per side.
- Side lying leg raise: Lie on your side, top leg straight. Lift it about a foot, lower slowly. Two sets of twelve per side.
Come back to lateral lunges once you can do all three without pain. Restart at the lateral squat, not where you left off.
Conclusion
Remember one thing. Sit back, do not sink down. That single cue turns a sloppy wide squat into a real lateral lunge.
Start with body weight. Add width and load only when your hips earn it.
Found this helpful? Share it with a training partner who only moves forward and back. Then drop a comment below and tell us which variation you tried first.
Frequently Asked Questions
Are lateral lunges good for weight loss?
They burn calories like any strength move, but no exercise spot reduces fat. Pair them with a full body plan and a calorie deficit for real results.
Why do my knees crack during lateral lunges?
Painless popping is usually gas bubbles or tendons gliding over bone. It is normal. Crackling with sharp pain or swelling is different, so get that checked.
Do lateral lunges make your thighs bigger or slimmer?
They build lean muscle in the glutes and inner thighs. Muscle shape changes, but size depends on your load, reps, and diet.
How long until I see results from lateral lunges?
Balance and hip control improve in two to three weeks. Visible strength and shape changes take eight to twelve weeks of steady work.
Are lateral lunges better than squats?
Neither wins. Squats build raw leg strength, lateral lunges build side to side control. Most people need both in the same week.